 Online Help
 ActivMan
 New Features
 Components
 Quick Start
 Multiple Sites
 Main Application
 Create a new user
 Create a new group
 Create a new template
 Create a new network connection
 Create a new database connection
 Using tags
 Using functions
 Modify existing users
 Extracting students from MIS
 Importing users
 Apply Template
 Get Missing IDs
 Options
 Usage
Usage
 Using actions when importing
 AutoImport
 Introduction
 Configure
 Usage
Usage
Creating a new template
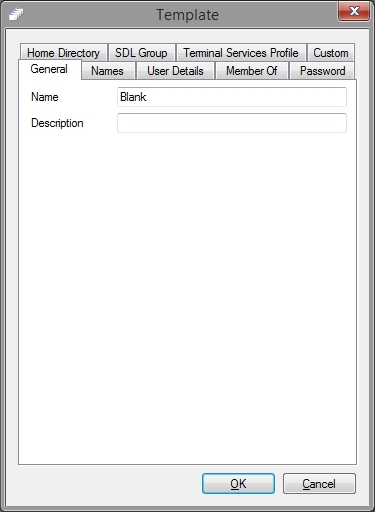
- Select 'New' on the 'File' menu, and select 'Template'
- Enter a name for the new template
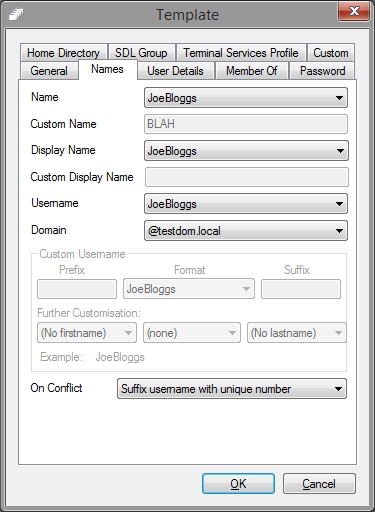
- Enter the details for the new template
- 'Display Name' is the text displayed in Active Directory.
- 'Username' is the format the username will be created based upon the user's firstname, middle initial, and lastname.
- Click 'OK' when finished

Custom Username Format

There are two levels of customisation for the username.
The first level allows you to add text before and after a predefined username format, i.e. "123JoeBloggs456". To enable this level you need to select "Custom" from the 'Username' drop down box.
The second level allows you to specify the order of the firstname and lastname and how many characters of each of the firstname and lastname to use. To do this, in the first drop down box select either the firstname or lastname and select how many characters to use, or select "(All firstname)" or "(All lastname)". Do the same for the last drop down box. From the middle drop down box select whether to use the middle initial or not. Using this option also uses the first level by adding the prefix and suffix text.
When changing these options an example will be updated with every change to give you an indication as to what the username will look like.
You can use tags in the prefix and suffix boxes. Please see here.
Domain
Select from the list which domain you would like assigning as the new user's principal domain.
This list should show all domains available for the server you have connected to.
NOTE:
Imported forenames, surnames, and initials are now pre-parsed to replace accented characters with standard characters.
For example, "Esmé" will become "Esme".
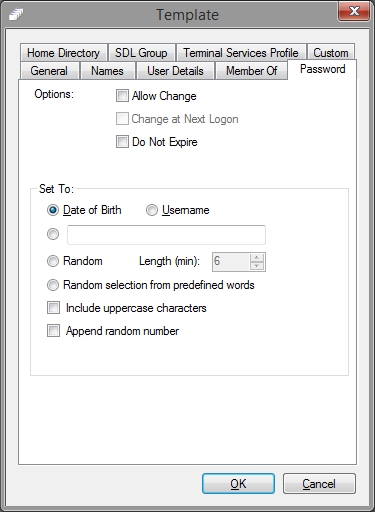
Password

Username
Selecting this option will set the password to be the same as their username.
Date of Birth
Selecting this option will set the password to the user's date of birth in the format of DDMMYY.
Custom
Selecting this option and entering text in to the box will set the password to be whatever you have set in the box, this could include tags.
Random
Selecting this option will set the password to a random number using the minimum length specified.
Random selection from predefined words
Selecting this option will set the password to a random word from the list of words specified in Options.
Only words that match or exceed the minimum length specified will be used, unless the 'append random number' is selected which will be included in the minimum length.
Include uppercase characters
Selecting this option will set the first alphabetic character to be uppercase.
Append random number
Selecting this option will append a random number between 100 and 999,999.
This will be included in the minimum password length.
On Conflict
The only options are: ignore and suffix username with unique number. The first option skips over any user who have the same username. The second option adds a unique number to the end of the username, starting at 1 and incrementing until one is found, i.e. JoeBloggs5. If a number is appended to the username it is also appended to the display name too, to avoid having to users with the same display name.
Member Of
Select which groups the user will be a member of when created using this template. If the groups specified in this list ever move or are renamed, then this list will need updating.
Home Directory
The 'Server' for the home directory has to be entered using its NETBIOS name (not including any backslashes). The 'Root Path' is the folder where we are going to create the one for this account. It MUST be the folder as the server sees it, i.e. 'C:\Users' and not '\\server\share\Users'.
SDL Group
Select additional groups to be added to the user's SDL group. If the groups specified in this list ever move or are renamed, then this list will need updating.
Share Path
The 'Share Path' option specifies the path of the share that will be used to set the home directory attribute of the user. This will be automatically updated when changing the home directory and share name format. You can specify your own share path by simply editing the field. When doing so you can specify tags, i.e. "[USERNAME]".
Terminal Services Profile
Specify the profile path, home folder, and permissions for Terminal Services.
Custom
You can specify any number of custom attributes that are not available elsewhere in the template. NOTE: However, the attributes MUST exist in the Active Directory schema. The entered name must be the LDAP "Display Name".
See Also:
